The home screen
The home screen is where it all begins. From
the home screen you select media files to convert, and you can also open the
conversion task list to view a list ongoing tasks and history finished tasks.
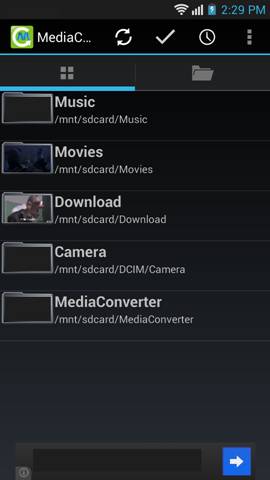
Thumbnail view
The thumbnail view will scan and all folders
containing media files. In settings, you may specify which top folders the app
should scan into; and you can also specify what file extensions should be
displayed.
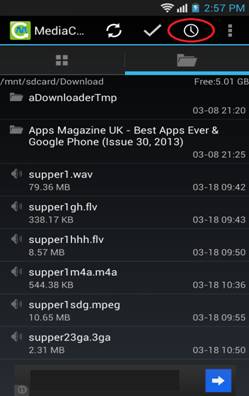
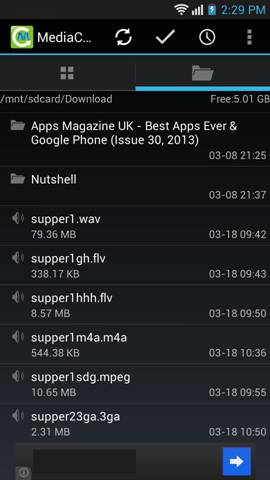
File tree view
The file tree view allows you navigate you disk
file hierarchy to find your media files to convert.
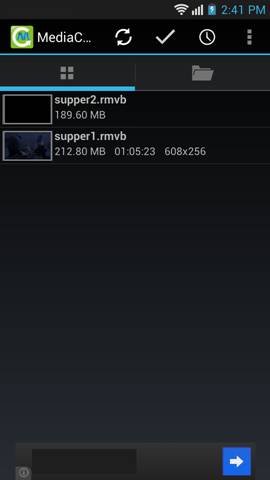
Multi selection
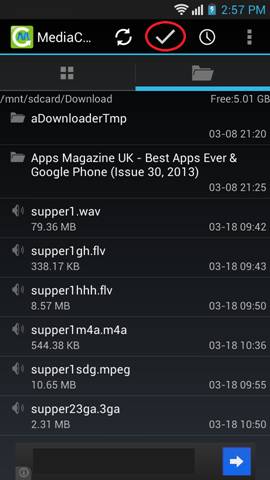
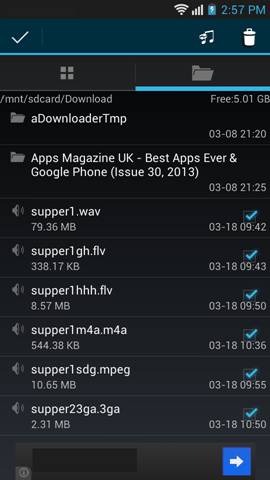 You may select multiple files to add
converting tasks in batch by using the multi-select functions.
You may select multiple files to add
converting tasks in batch by using the multi-select functions.
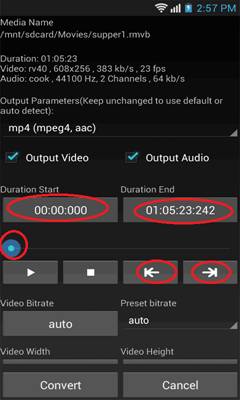
The conversion parameters
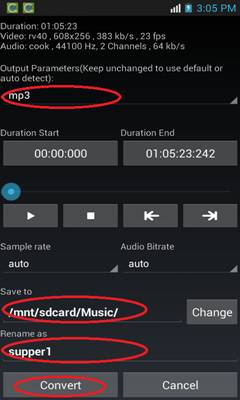
The basic parameters for beginners
For beginners, you only need to set select the
output formats/container from the output format list, and keep all other
parameters unchanged, and select “Convert” to start the converting.
You may also want to change output destination
folder and the output file name, to do these, scroll to the end of the setting
page, and edit the “Save to”, and “Rename as”.
For converting to audio, please select one of
the following container/profile: mp3, m
For converting to video formats, please select
one of the following container/profile: mp4, 3gp, ogg,
avi, mpeg, flv.
Advanced parameters
settings
1.1.
Clip from a video/audio
Set
the duration start and duration end to get a clip from the original media.
1.2.
Video advanced parameters
1.2.1.
Video bitrate
Video
bitrate is mainly used to control the output video quality, output file size.
The default bitrate for video is 200kb/s. In general, higher bitrate, better
quality, and bigger file size.
What
bitrate should I use when converting my video?
Unfortunately,
there is no standard, the only way to determine the best bitrate for your need is
trial-and-error.
Note
that video quality is subjective, and other encoding
options like resolution and frame rate also have an effect on quality.
1.2.2.
Resolution
If
you are converting video to be played on a lower resolution screen device, you
might want to lower the output video resolution to minimize the output file
size, since high resolution video will not produce better quality images on low
resolution screen device.
It
is recommended to keep the ratio of the width and height when changing the
output resolution. Changing the ratio can lead to a squishing or stretching image
effect that is unsightly.
To
use a preset resolution, please select from the preset resolution list. For 3gp, only certain resolutions are supported.
Following is a table of the output resolution, bit rate and
the corresponding file size:
|
Output resolution |
Bitrate |
File size |
|
320x240 pixels |
400 kbps |
3MB / minute |
|
480x270 pixels |
700 kbps |
5MB / minute |
|
1024 x 576 pixels |
1500 kbps |
11MB / minute |
|
1280x720 pixels |
2500 kbps |
19MB / minute |
|
1920x1080 pixels |
4000 kbps |
30MB / minute |
1.2.3.
Frame rate
The
frame rate is how many unique consecutive images are displayed per second in
the video to give the illusion of movement.
Around
24 frames per second, the typical film rate which often gives a "cinematic
feel," is where most video creators land and is also a point that most
human eyes are fooled into perceiving motion.
Generally
you should never exceed the frame rate of the source video. The best illusion results
will be achieved if the frame rate is kept the same as your original source.
Lower
frame rate might produce a better image quality, but less smooth motion; if
motion is smooth enough with a lower frame rate, the video bitrate can be lower
to minimize the output file size.
1.3.
Audio advanced parameters.
1.3.1.
Audio bitrate
Similar
to video bitrate, audio bit rate is mainly used to control the output audio
quality, output file size. In general, higher bitrate, better quality, and
bigger file size.
For
mp3, the default audio bitrate for mp3 is 128kb/s, which is sufficient for most
users. You might consider choosing 256kb/s for close-to-CD quality, without increasing
too much of the output file sizes.
1.3.2.
Sample rate
To
have very low audio bitrates, reduce the sampling frequency (e.g. down to 22050 Hz for MPEG audio). Changing the sample rate might result in a distorted output
sound, in this case, do not change the sample rate.
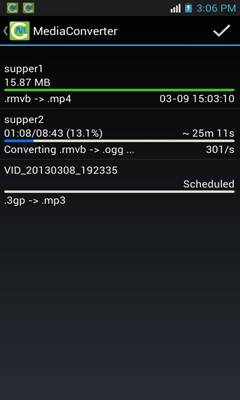
The task list screen
As soon as the conversion has started
you can keep track of the conversion progress here.
Conversion tasks are processed in a
queue, only one task can be active at a time.
Also the history finished tasks are
also listed here at the top of the list.
To cancel ongoing tasks, or delete the history records, you may click the
multi-select icon from action bar, or long press on a task, and then select
“delete” function.
Note that deleting only cancels the
ongoing tasks or deletes the history records; the output files (if any) will
not be deleted.